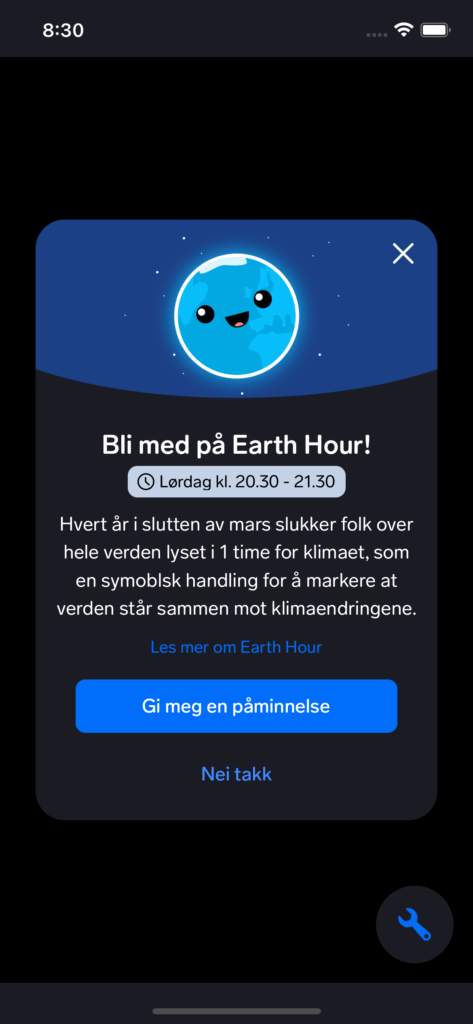
Hello guys, today we will be using a design system framework for iOS. Specifically, we will build the the screen like as image:
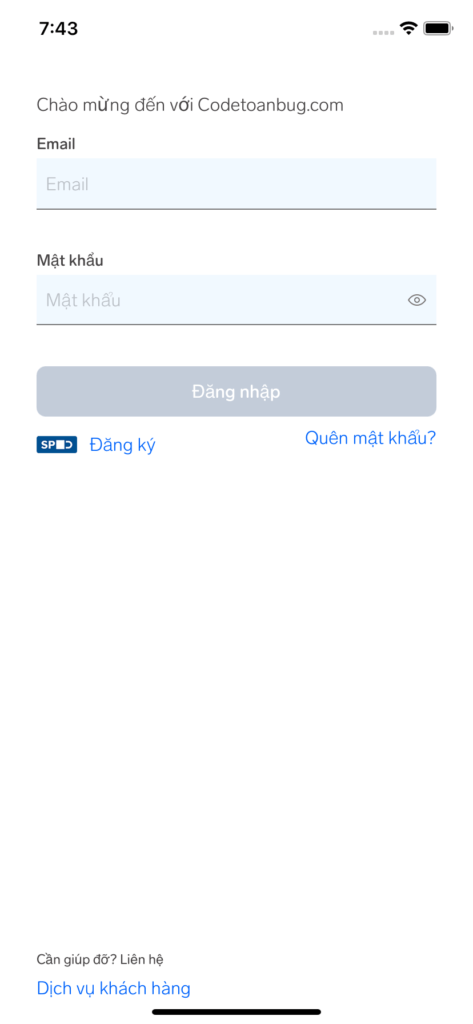
This view is a ready-made library, your work is change the text on the screen. Completely simple and takes no time.
FinniversKit framework
FinniversKit framework is an open source built on top of their UI/UX design system. You can see the source code here:
https://github.com/finn-no/FinniversKit
If you are a developer interested in user experience and design styles, then you have probably heard of the concept of design system. I would like to share easy-to-understand articles about design systems here by author An:
So FinniversKit is transforming a design system on figma or other design tools into a framework that can be used on iOS.
Let’s walk through this framework a bit:
Color – Font – Spacing
We have the following color range:
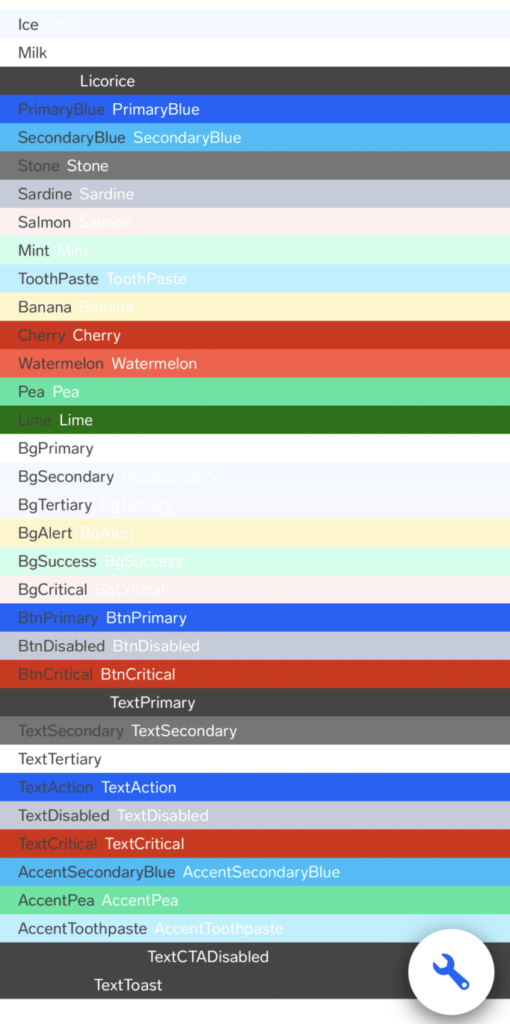
These are all the colors that can be used in this framework, in other words, if you use a color other than this color range, you are not complying with its design system.
If you’ve read about POP in my previous post, follow the code below and you’ll be familiar:
You will see that they designed a protocol to define all the colors that can be used. The color code definition is as follows:
With POP we will not need to inherit, but still ensure the encapsulation of the data, namely the colors above.
If you want to apply them to our project, check out their demo:

or simply UIColor.ice
Second, let’s talk about Fonts. In other words, Typography – typeface.
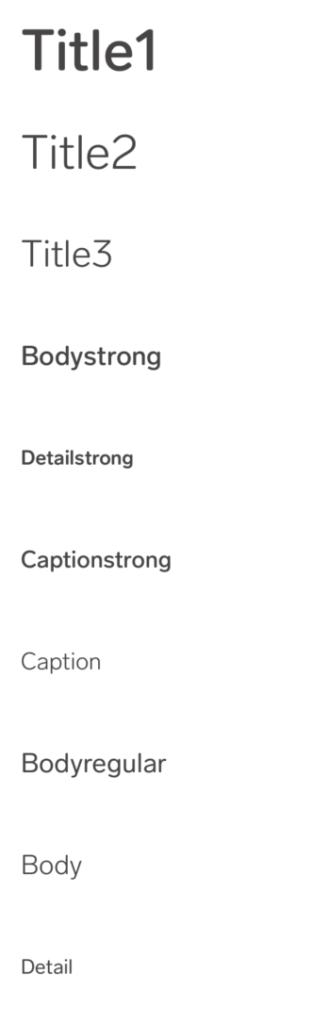
These are the typefaces that we can use. To apply the application method, simply go to the FontDemoView.swift file.
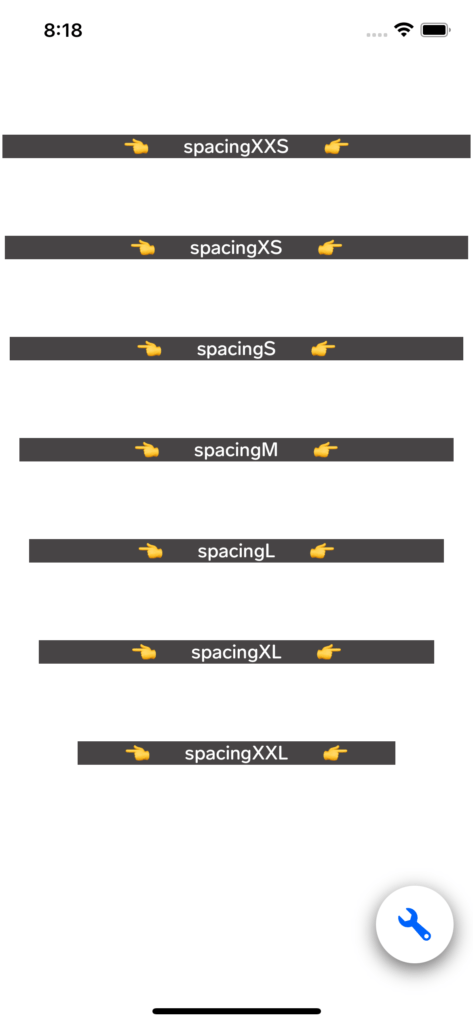
About spacing – the distance can be used as shown:
Components
About the components in this framework, it is very important that we can reuse it in many places. The most common components like button, textfield, loading… will save us a lot of time. Instead of you having to redraw a button: in terms of contours, shadows, shadows, effects, etc., simply reuse the types of buttons they already support:
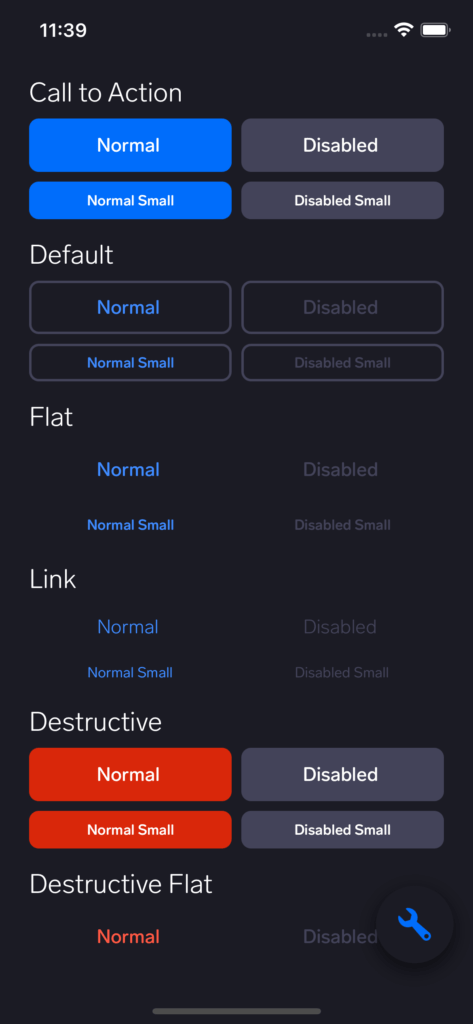
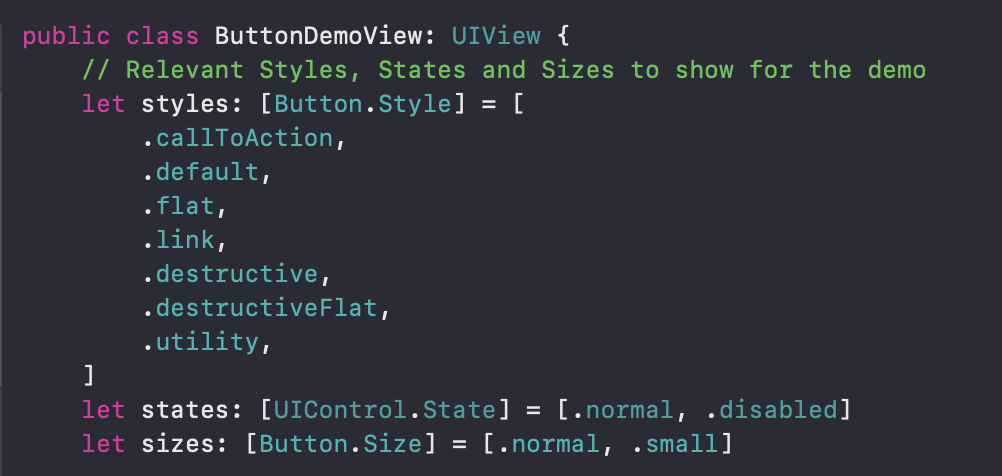
To understand how to use it, let’s simply go to their ButtonDemoView.swift demo screen. If you really don’t know which demo it belongs to, use the UI debug tool to see
There are many other components that you can run their demo application to see. I really like this framework, because it also supports dark mode:
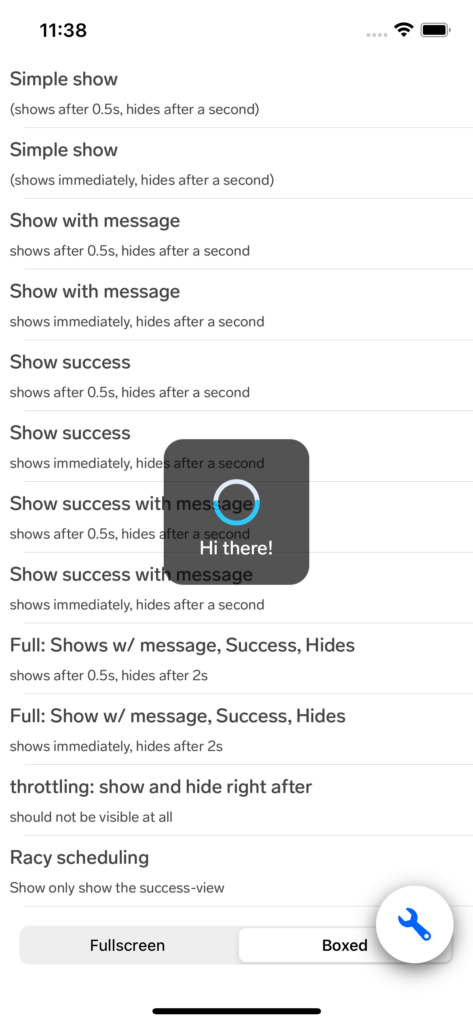
Many other components, for example loading:
Using FinniversKit in iOS projects
To use this framework, in the readme there are many ways, among which is simply using pod.
For this article alone, I will use Carthage. The reason is because I am obsessed that pod build is very slow when using too many pods in the Podfile. And this tutorial is also intended to give you a reference on how to implement Carthage.
First you have to install Homebrew:
ruby -e "$(curl -fsSL https://raw.githubusercontent.com/Homebrew/install/master/install)"Update Homebrew:
brew updateInstall carthage:
brew install carthageWhen you has finished installing. Let’s create a Cartfile in your project directory:
touch CartfileAdd this line to the file:
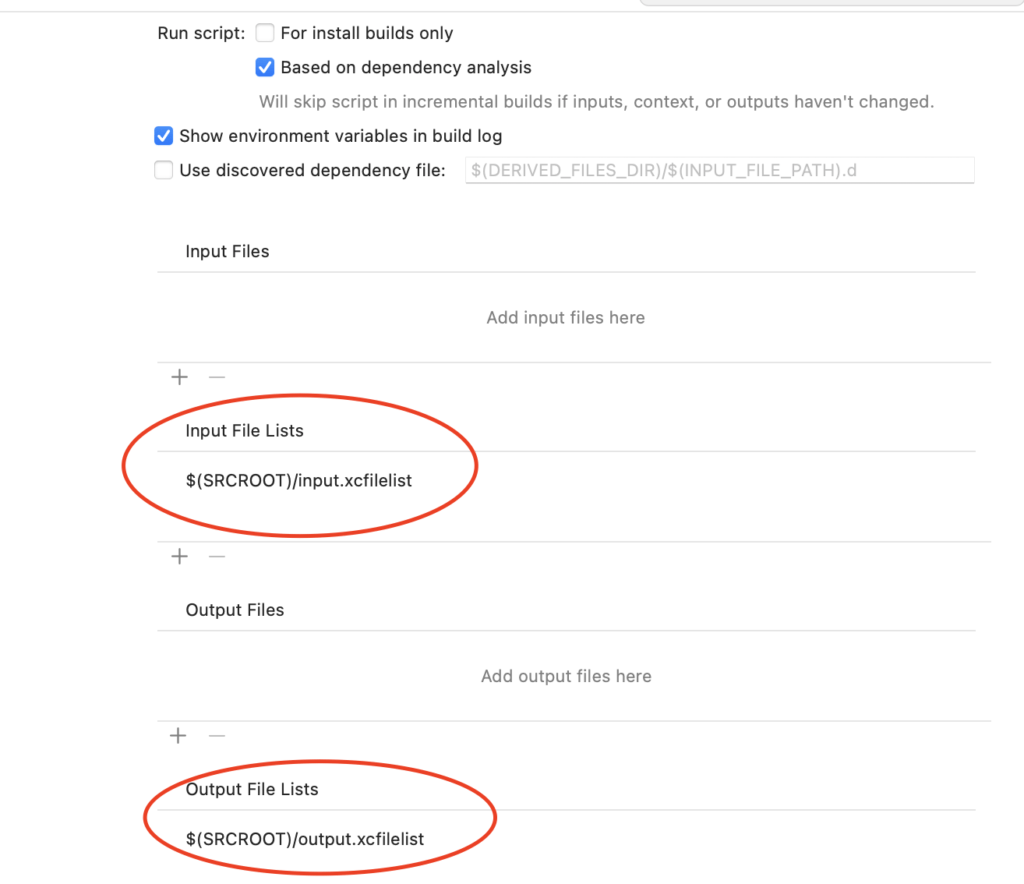
github "finn-no/FinniversKit" "master"Add file input.xcfilelist and add this line:
$(SRCROOT)/Carthage/Build/iOS/FinniversKit.frameworkAdd output.xcfilelist and add this line:
$(BUILT_PRODUCTS_DIR)/$(FRAMEWORKS_FOLDER_PATH)/FinniversKit.frameworkAdd file carthage.sh:
Add run permission to it by typing terminal:
chmod +x ./carthage.shFinally run the following command to build the above library:
./carthage.sh update --platform iOS --new-resolverThe above command prevents it from rebuilding the already built Carthage frameworks and only builds for iOS. Wait for the first build, then Carthage generates the built framework folder for iOS:
../Carthage/Build/iOS/FinniversKit.frameworkThe end is adding libraries.
First Tab to the General of the project and click the “+” button of the Linked Frameworks and Library section:
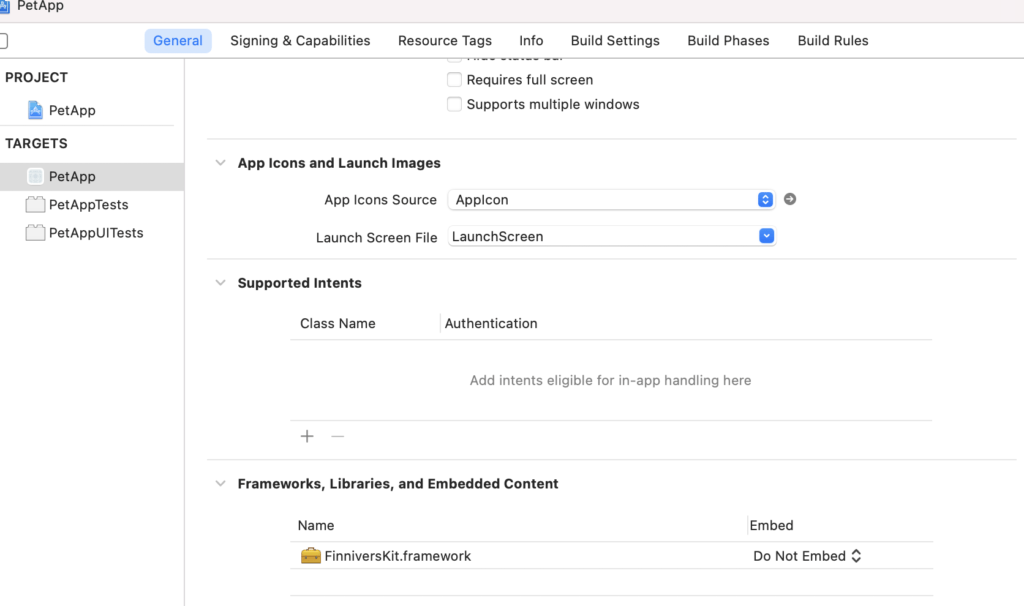
After adding the necessary Lib, we go to Build Phases, click the + button, select New Run Script Phase:
/usr/local/bin/carthage copy-frameworksAnd fill in as screen:
This lets Xcode copy the framework into the project and use it.
After successfully adding FinniversKit, let’s create a demo login screen for example:
The result is the same as the first image.
The entire sample project you can download here:
